Interested in a career at Veramatic? We want to hear from you.
Apply Now →
Every report in one organized home
Report Center brings your Reports and Dictionaries together, guides every upload, and keeps a clean run history for each report — so the right numbers are always easy to find and fast to run.
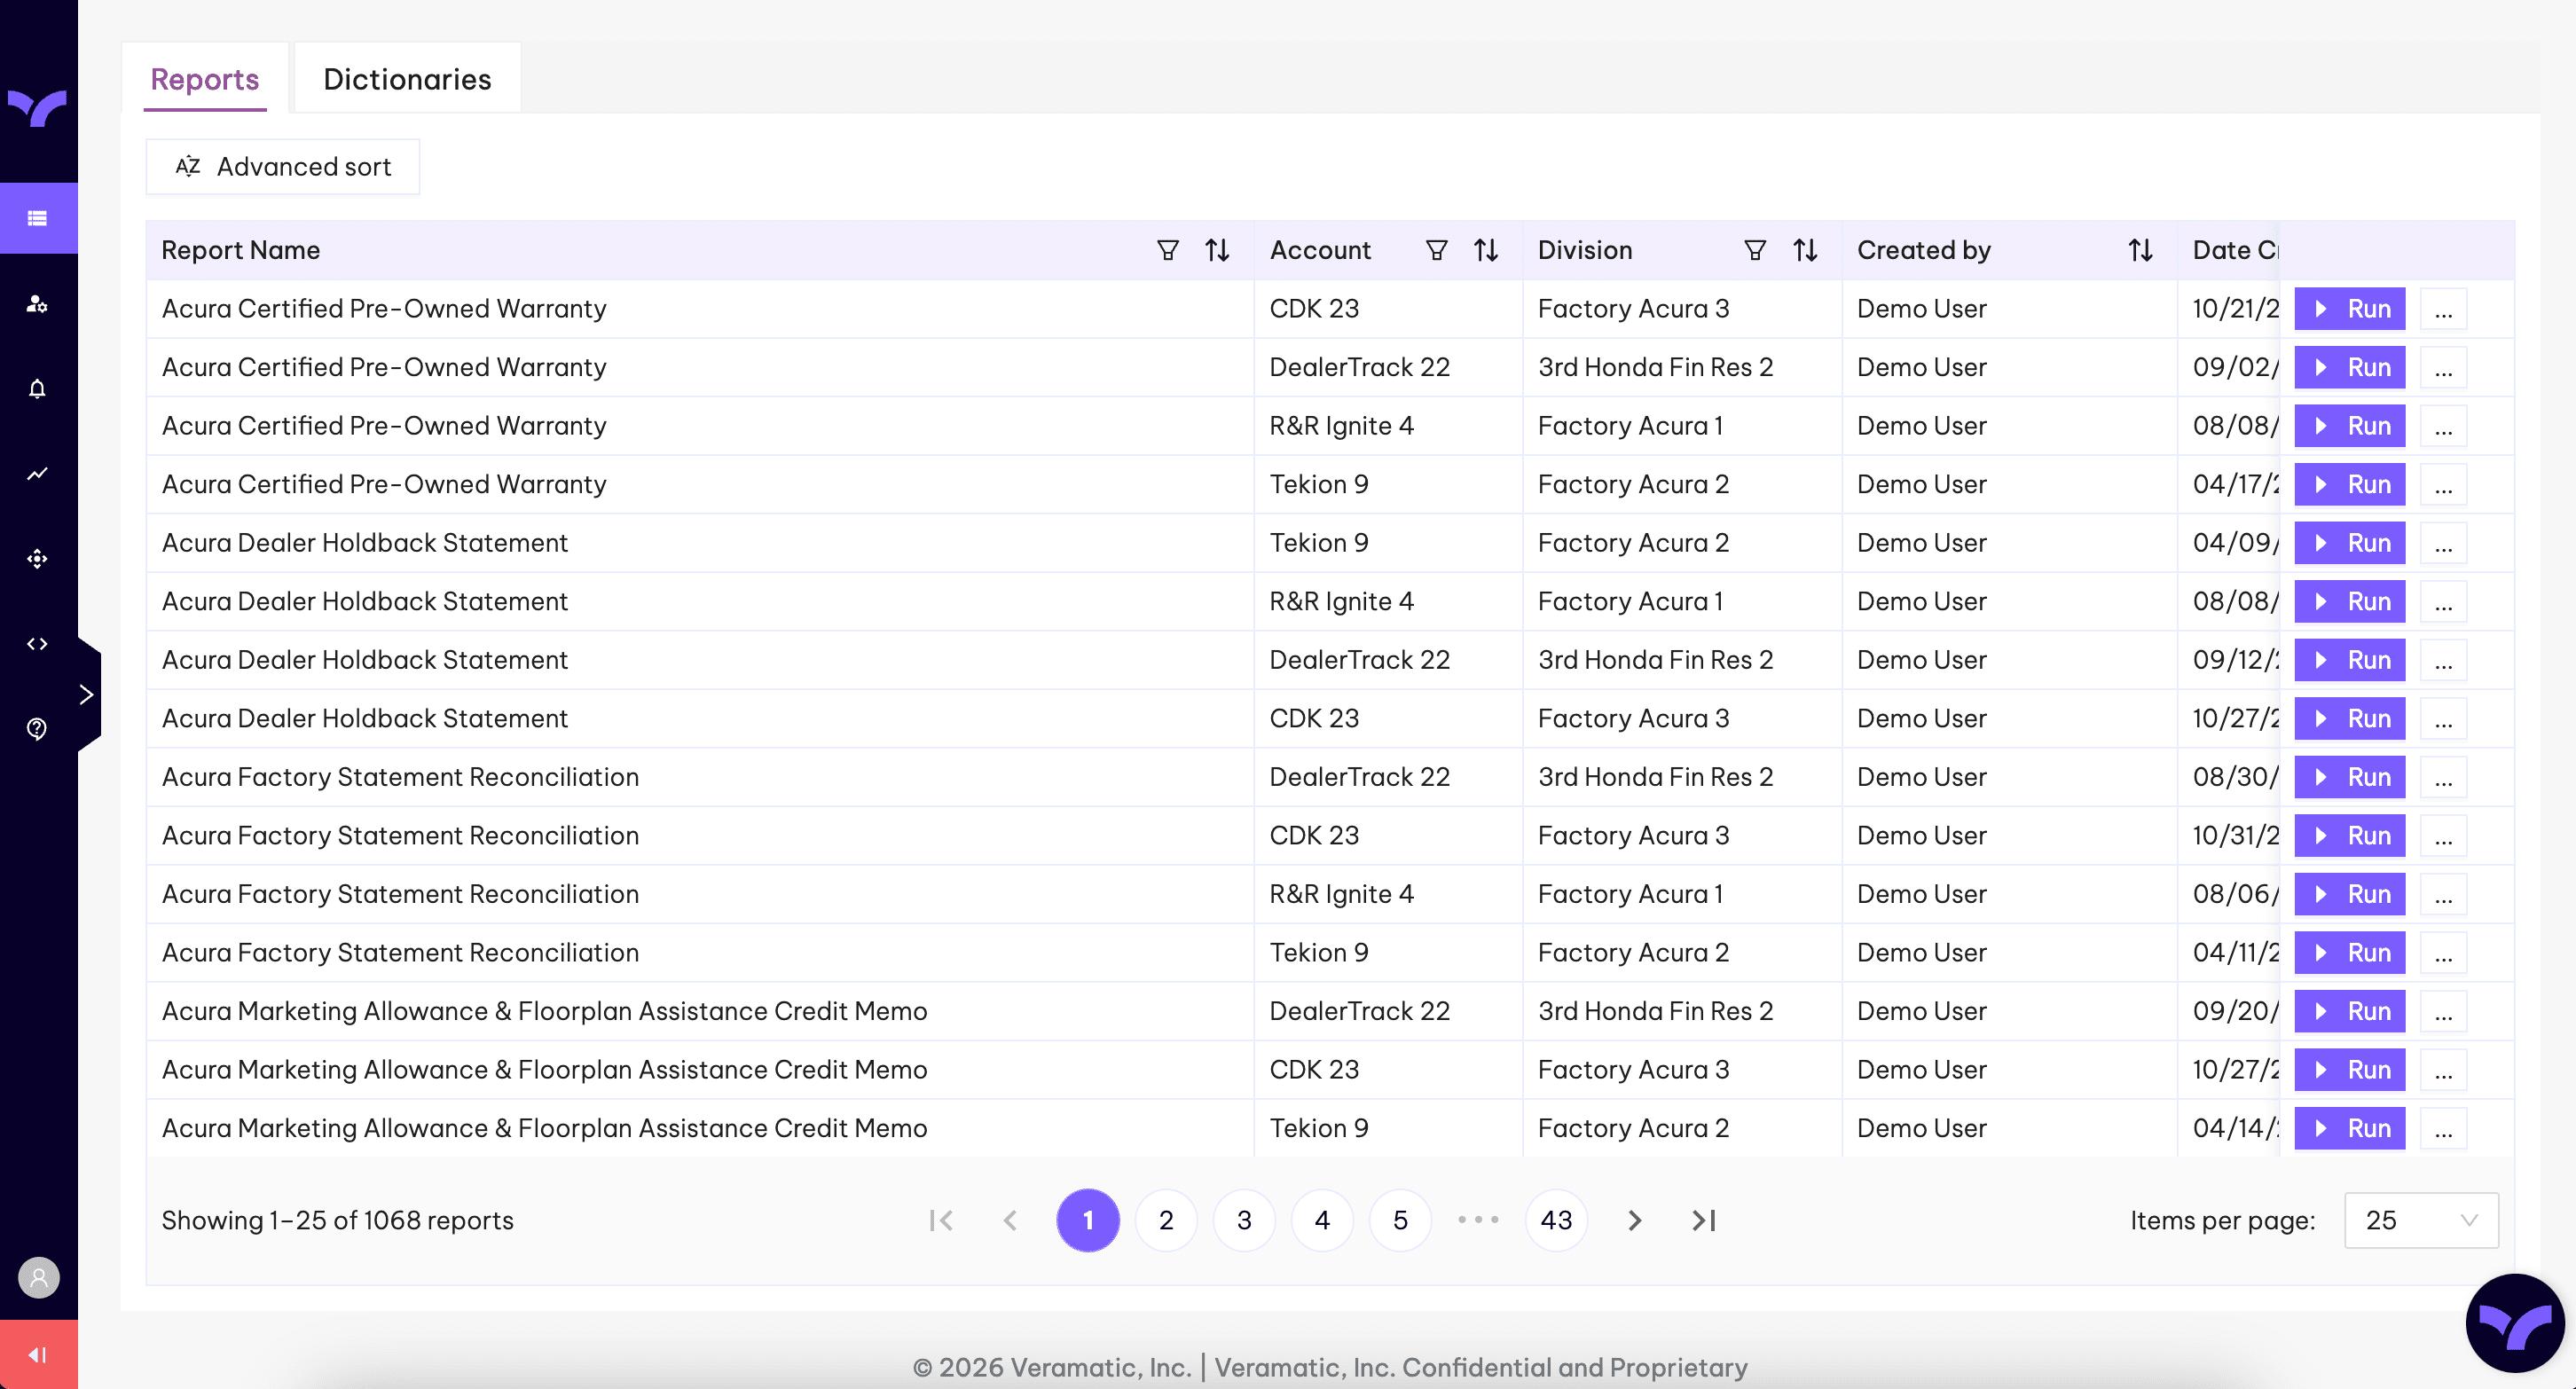
When you log in, you’ll land on the Report Center tab instead of Documents. The old Documents and Dictionaries tabs have been combined into one place, and the Dictionary tab now lives inside Report Center — use the top navigation to move between the Reports and Dictionary tabs.
Why it matters
Report Center is now the main hub for both Reports and Dictionaries.
How it works
Log in — you’ll land on Report Center instead of Documents.
Use the top navigation to move between the Reports and Dictionary tabs.
02Find & run
Locating and running a report
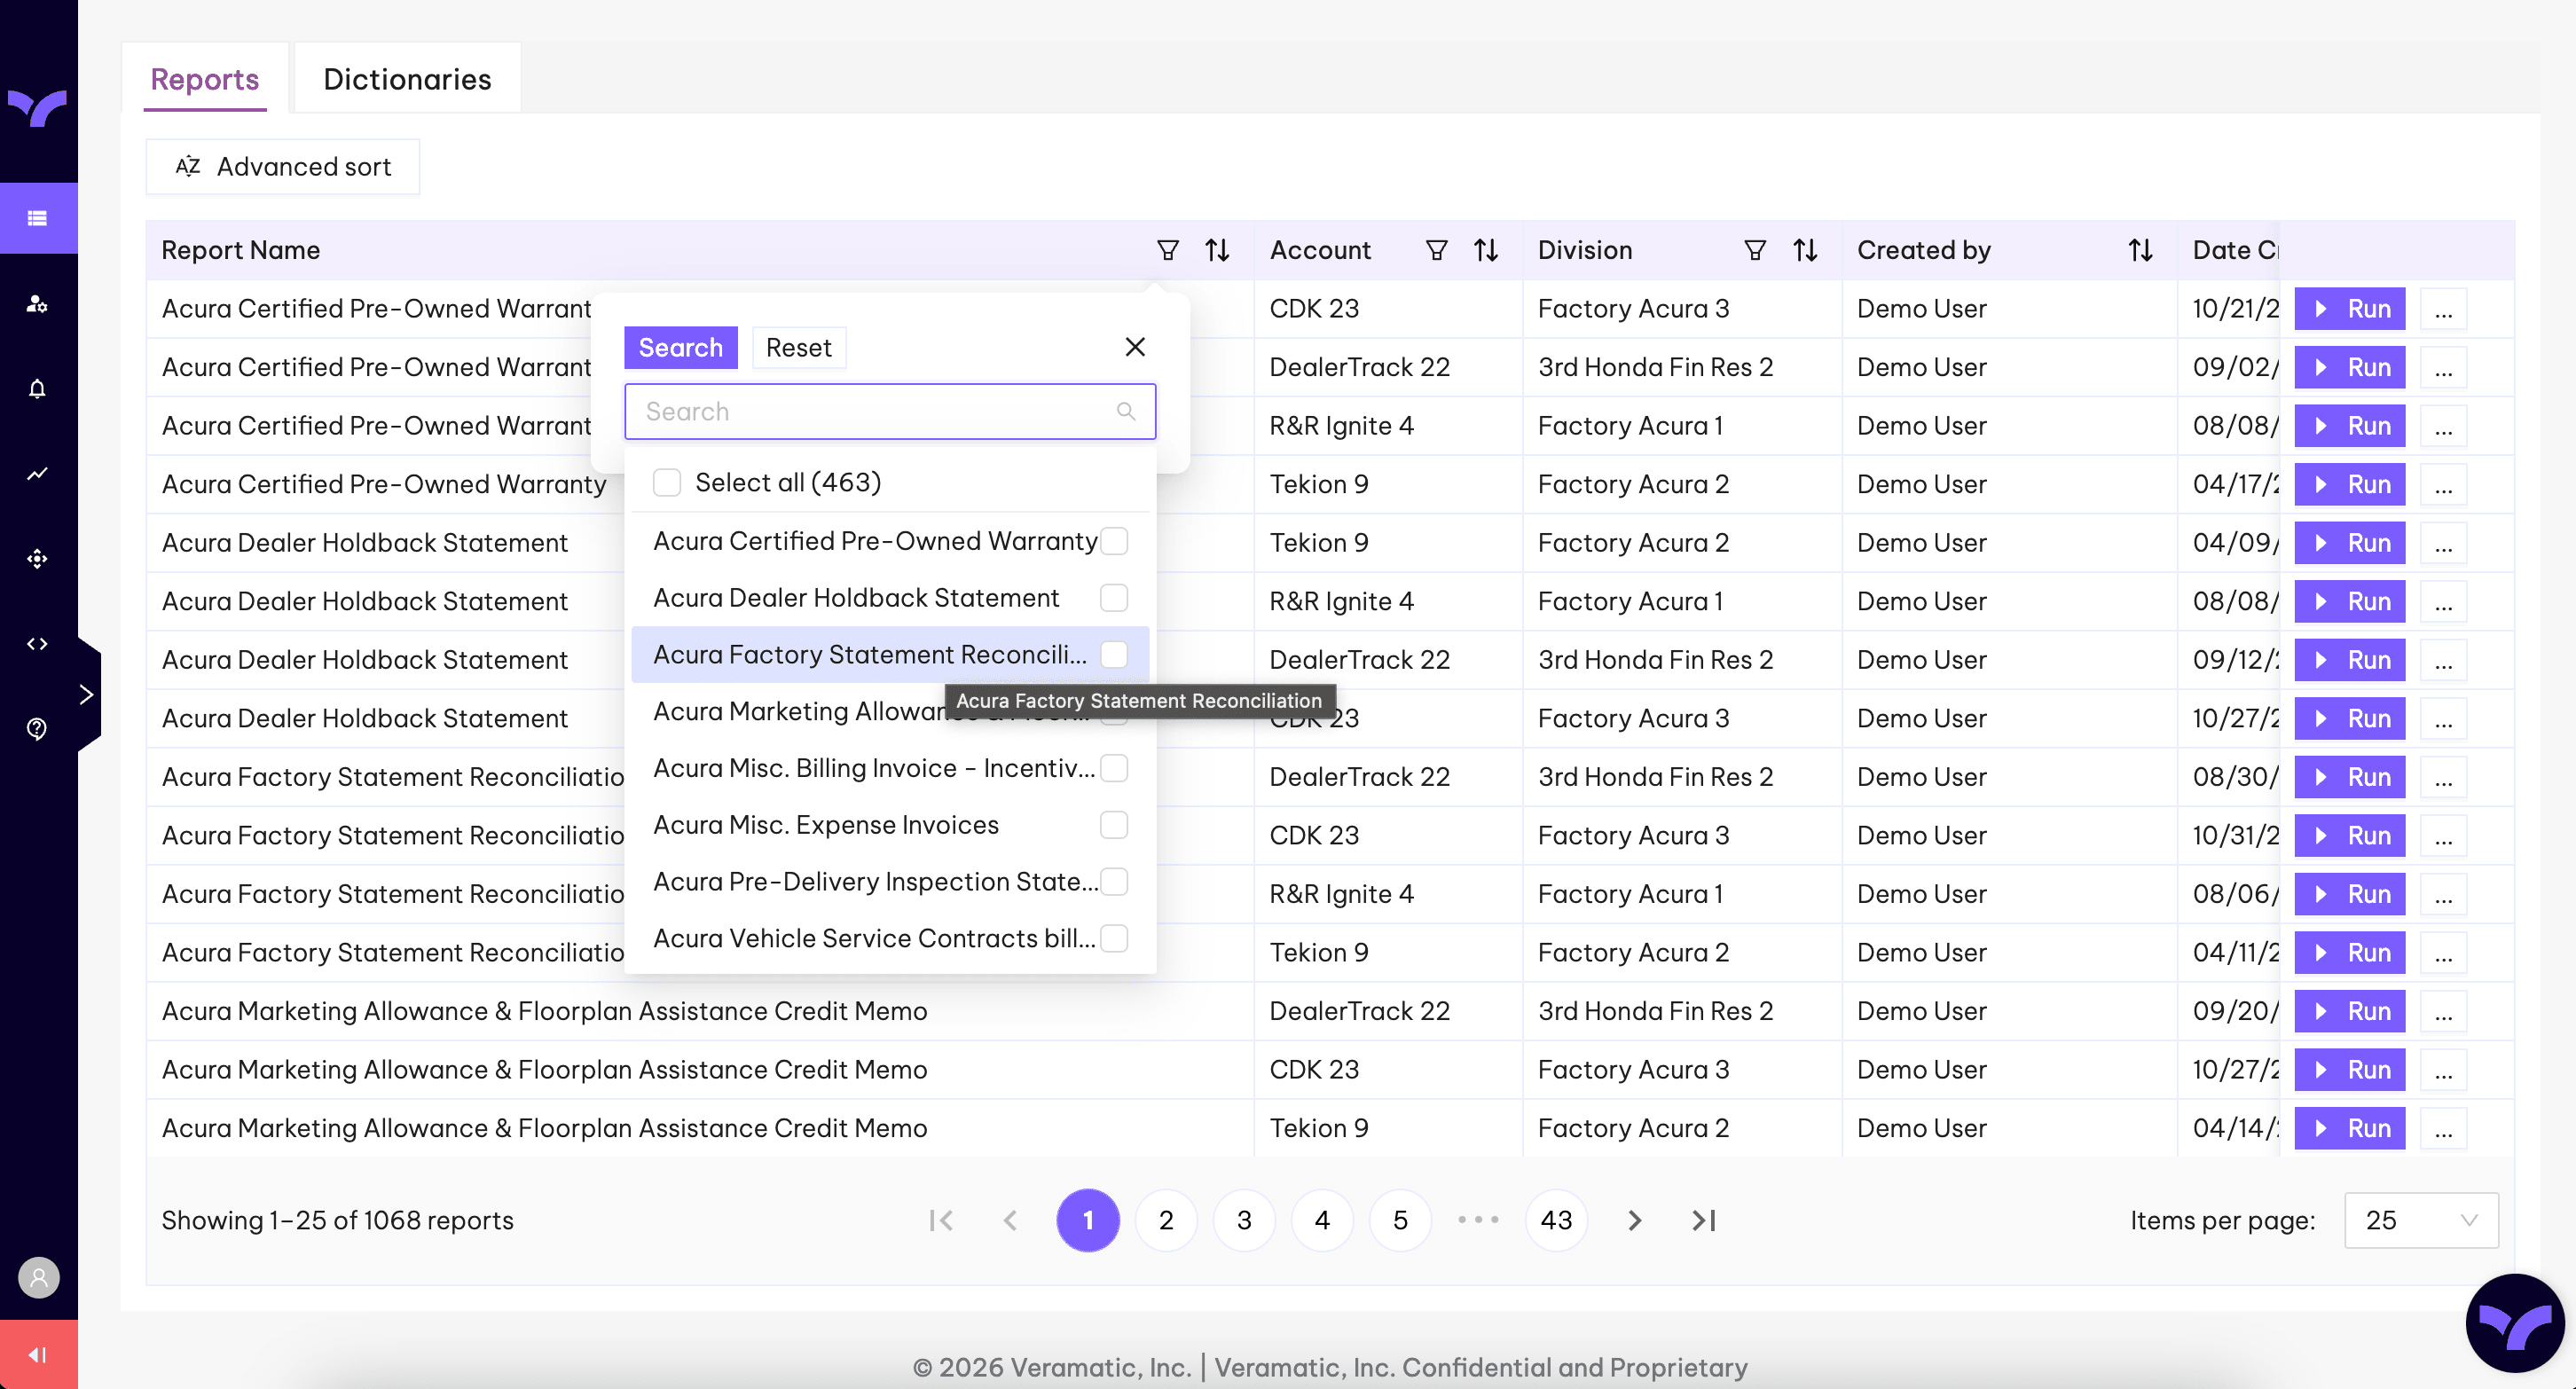
In the Reports tab, you’ll see all available reports you can run. The table shows which division and account each report belongs to, and you can sort or filter it to quickly find the report you need.
Why it matters
You can be intentional about which report you run — the account and division are always in view.
How it works
Locate the correct account and division.
Select the report you want.
Click Run.
03Guided upload
Upload your files with guided validation
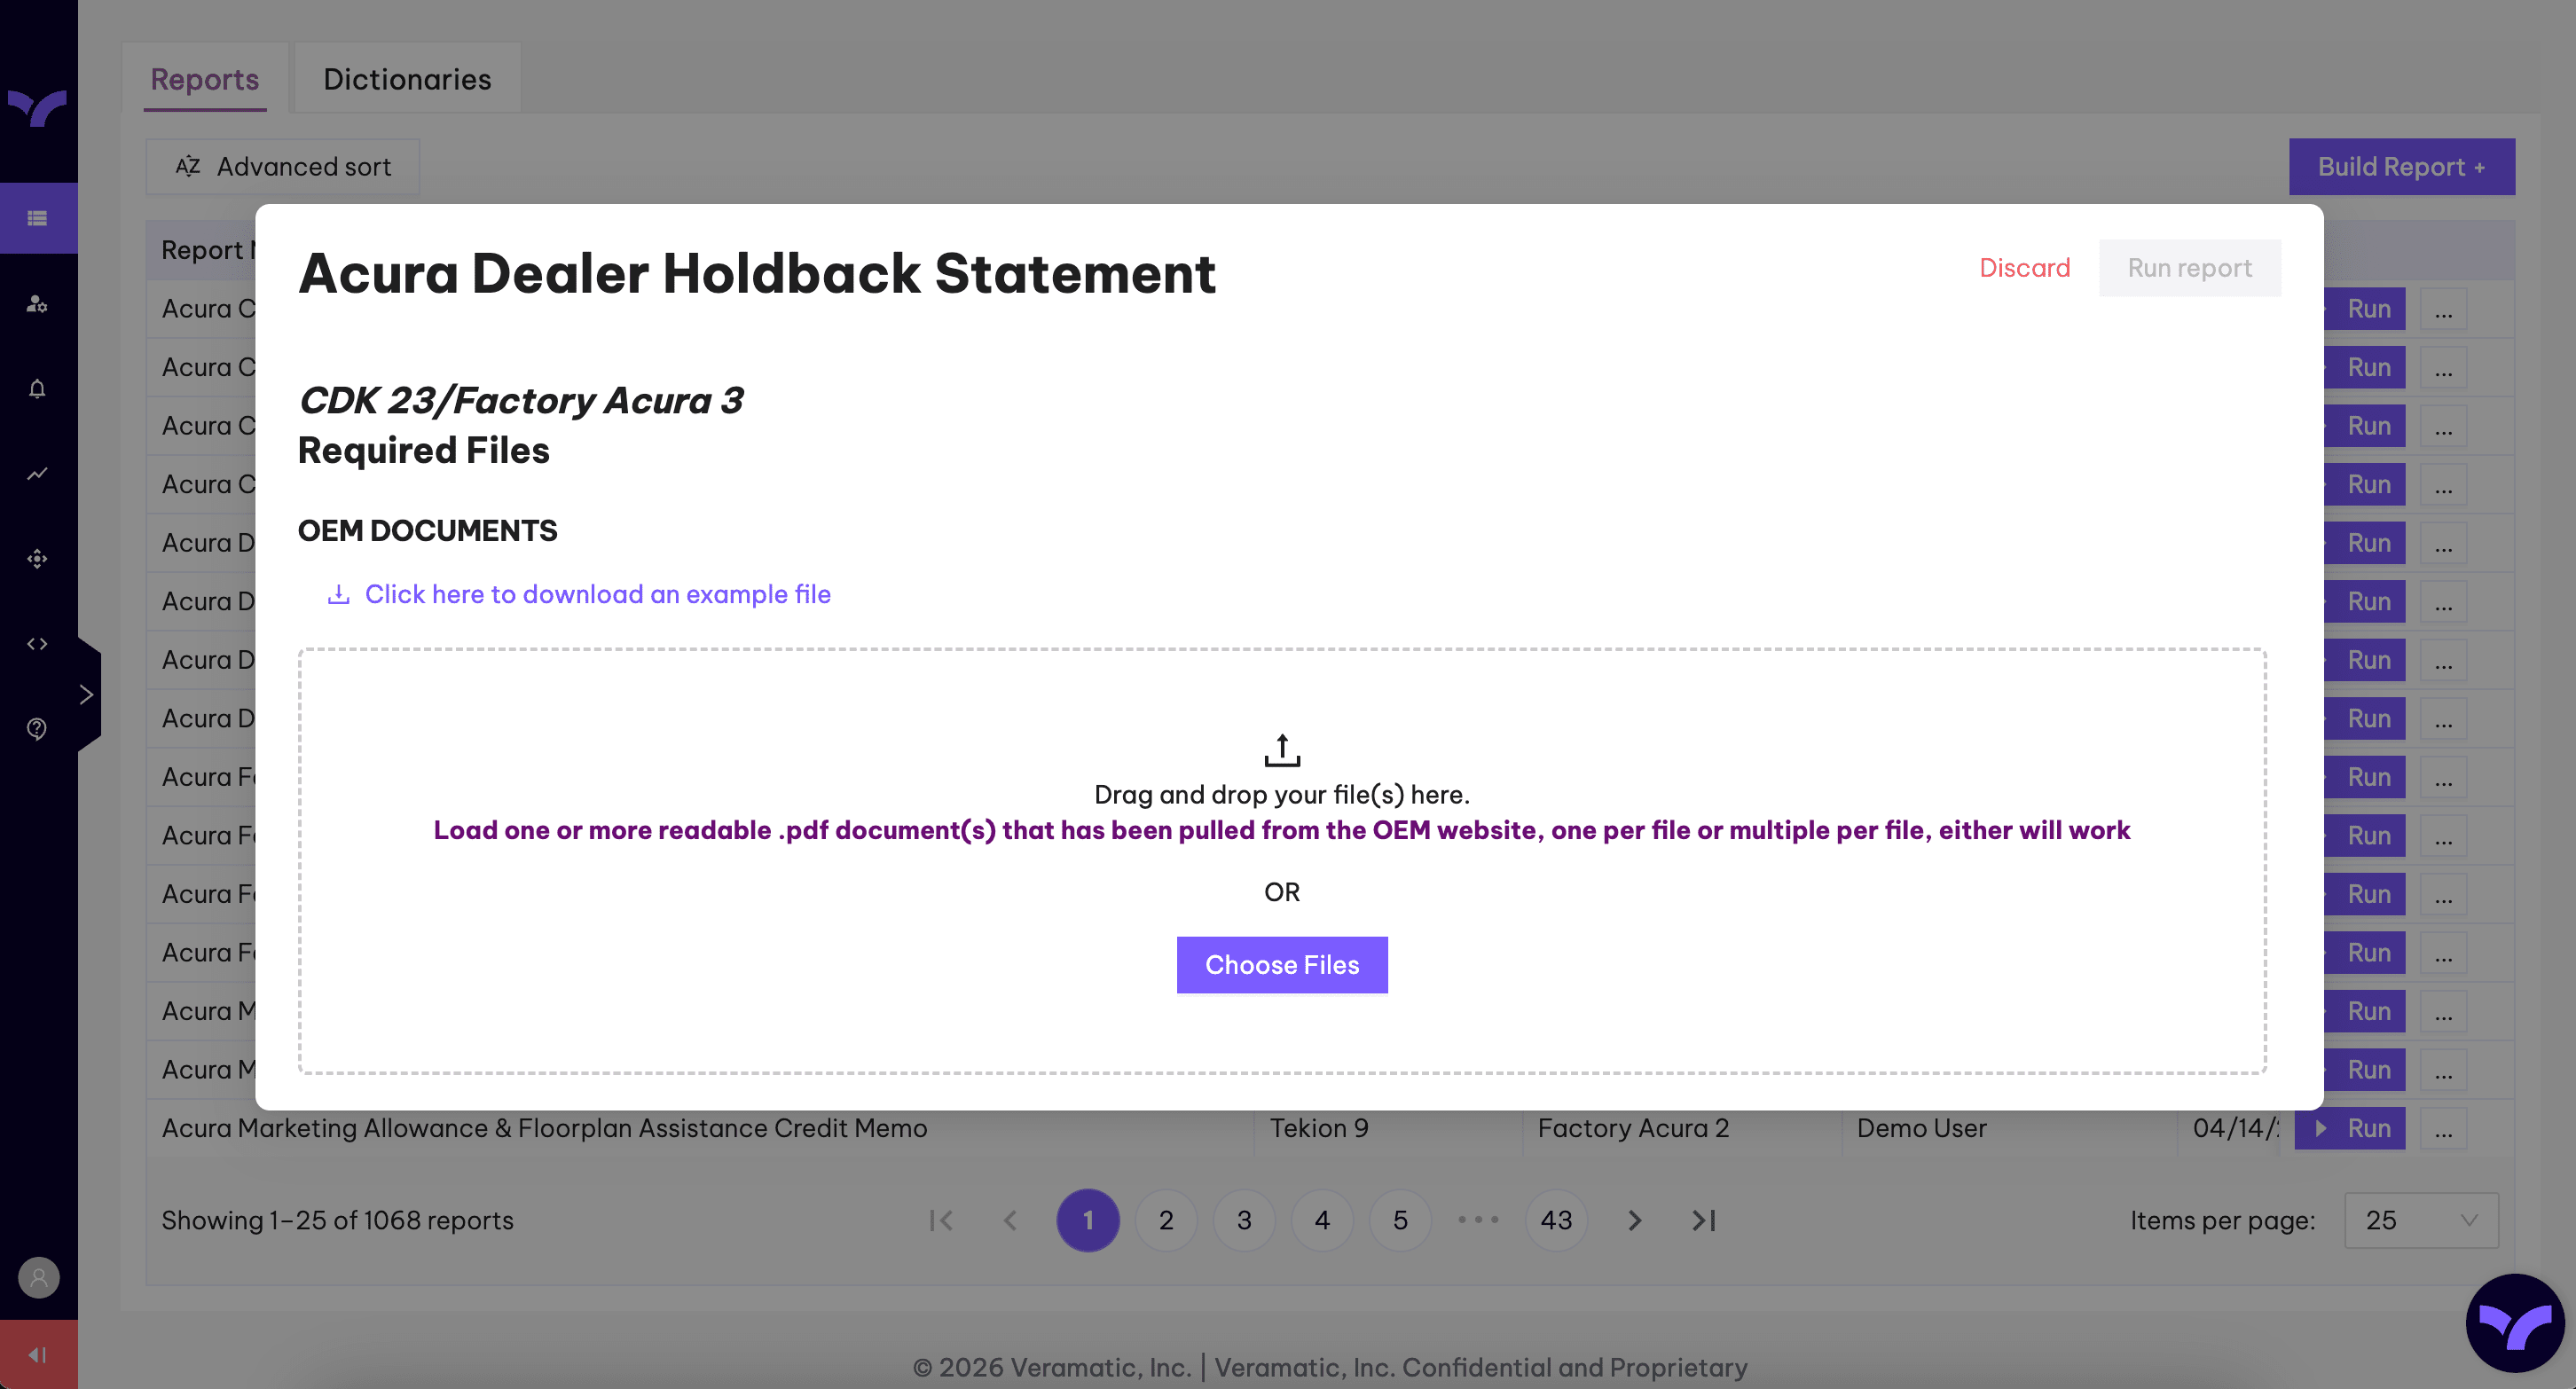
After clicking Run, you’ll see a more guided upload experience. Each upload box includes notes to help you choose the correct document and shows the file type expected, such as an OEM document. You can click Download example file to see the expected format before uploading.
Why it matters
Intelligent error handling keeps you from running a report that has file issues.
How it works
Drag and drop or select each file into the correct box.
If a file is wrong, you’ll get clear feedback and can remove it — the system tells you exactly which one is the issue.
Once all files pass validation, click Run Report.
04Cleaner results
Viewing your rendered report
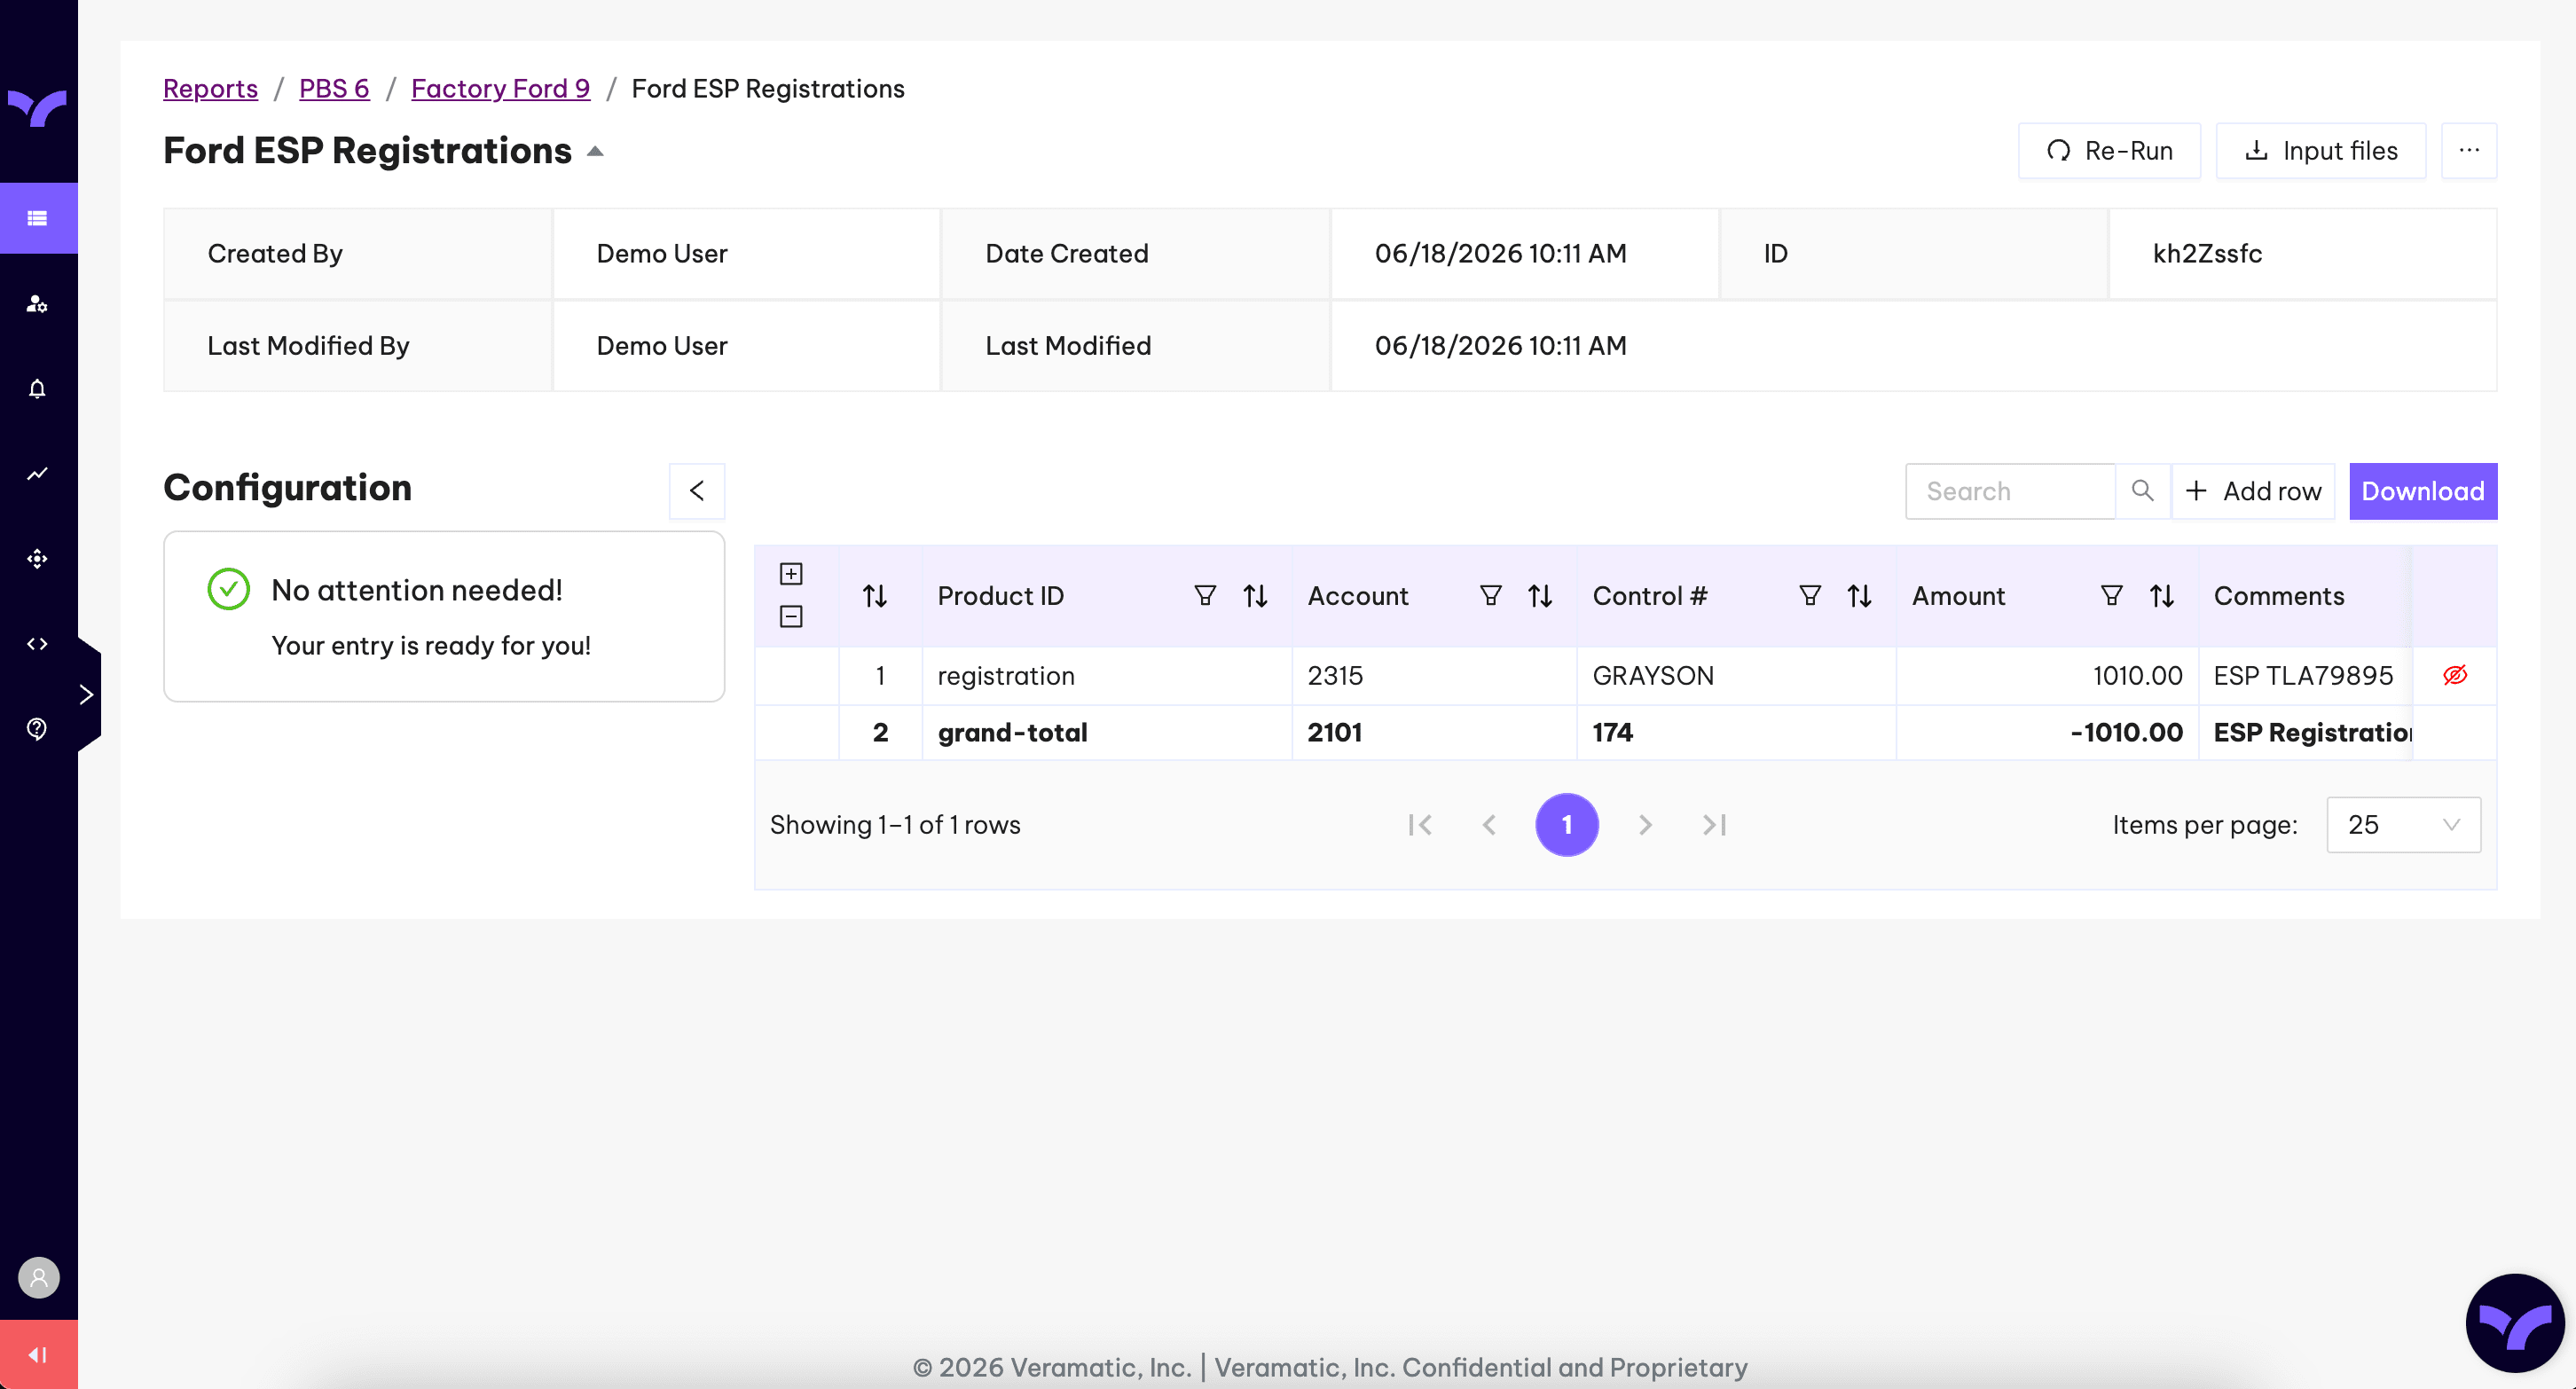
The Report Meta header now shows details such as the creator, who ran it, the last run time, and a unique identifier. The Configuration section highlights any issues or required actions — and confirms when no attention is needed. You can hide or unhide rows instead of deleting them, search for specific items, and re-run from a clearly labeled button in the top-right corner.
Why it matters
A dedicated, cleaner layout for working through exceptions.
How it works
Check the Configuration section — if it shows no attention needed, you’re set.
Hide or unhide rows as needed; hidden rows won’t appear in your download.
When multiple tabs are present, you will be presented with multiple export options within one single Download or Copy button.
05Run history
View and manage report run history
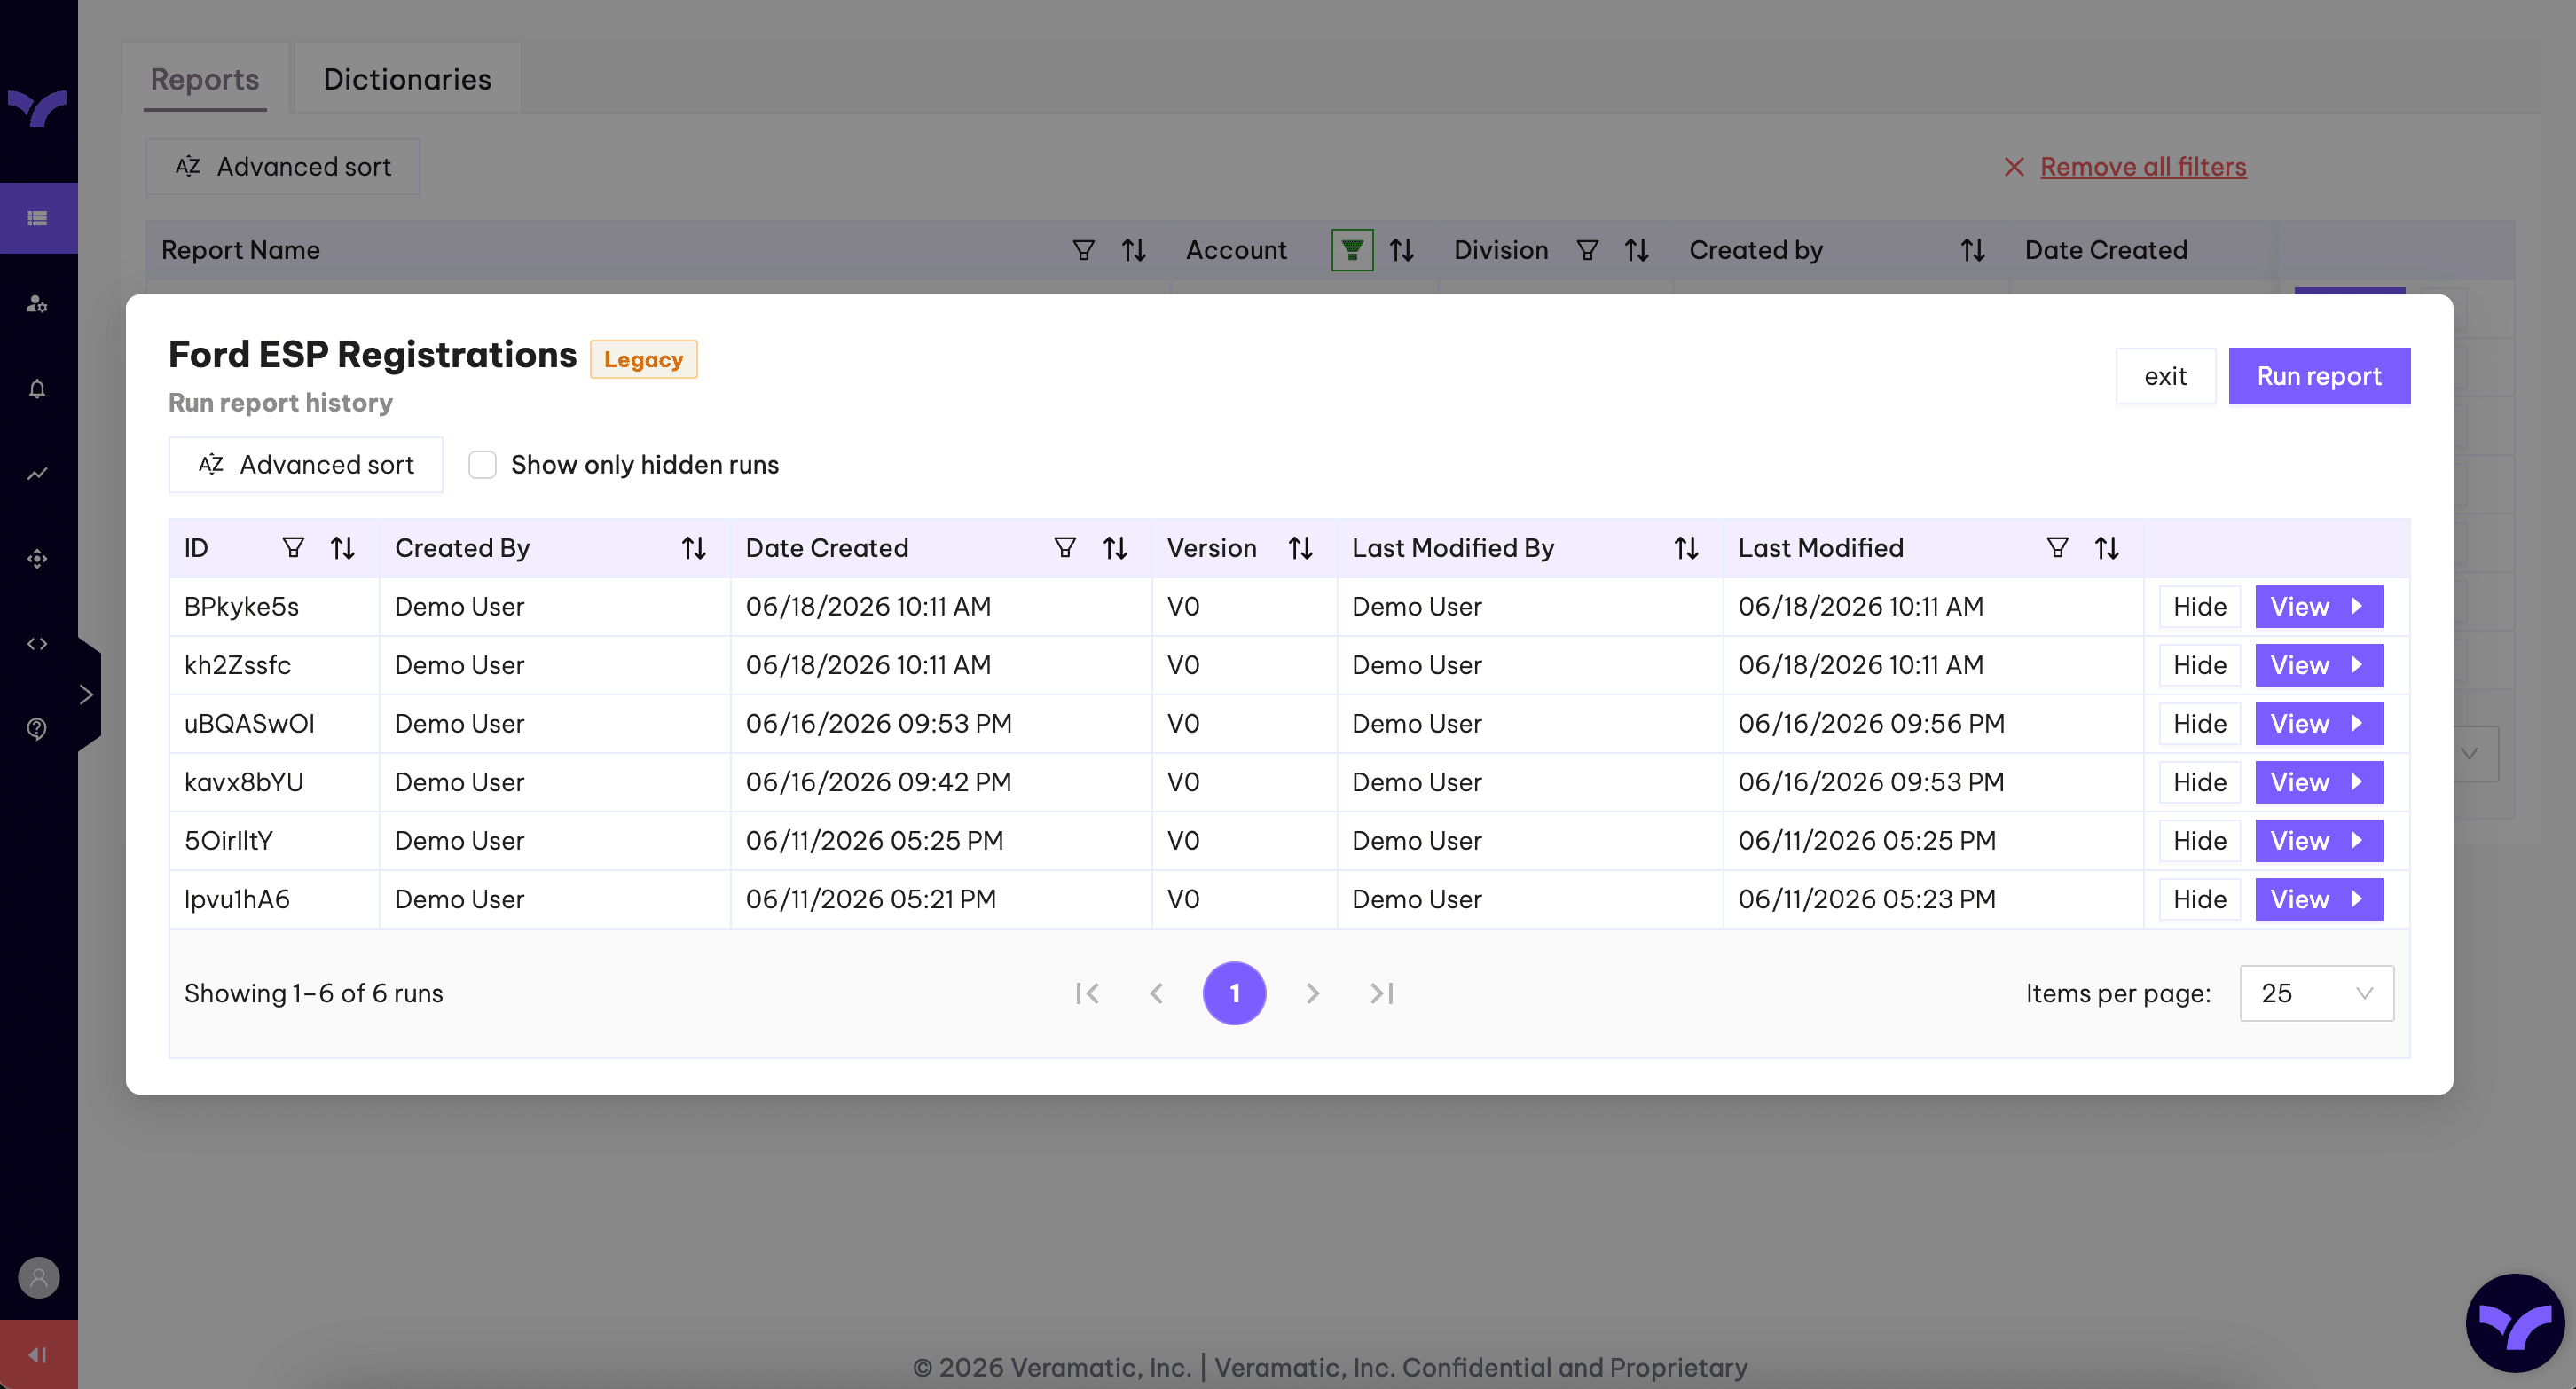
Run history is now organized and viewed for each report individually. Open the menu next to the Run button and then click View Run History, and a window shows the past runs for just that report.
Why it matters
A dedicated, report-specific view of your historical runs.
How it works
Click the … button for a report, then choose View Run History.
Hide runs you don’t need — use Show Only Hidden Runs to review them.
Click Unhide to make a run visible again.
06Accounts & Divisions
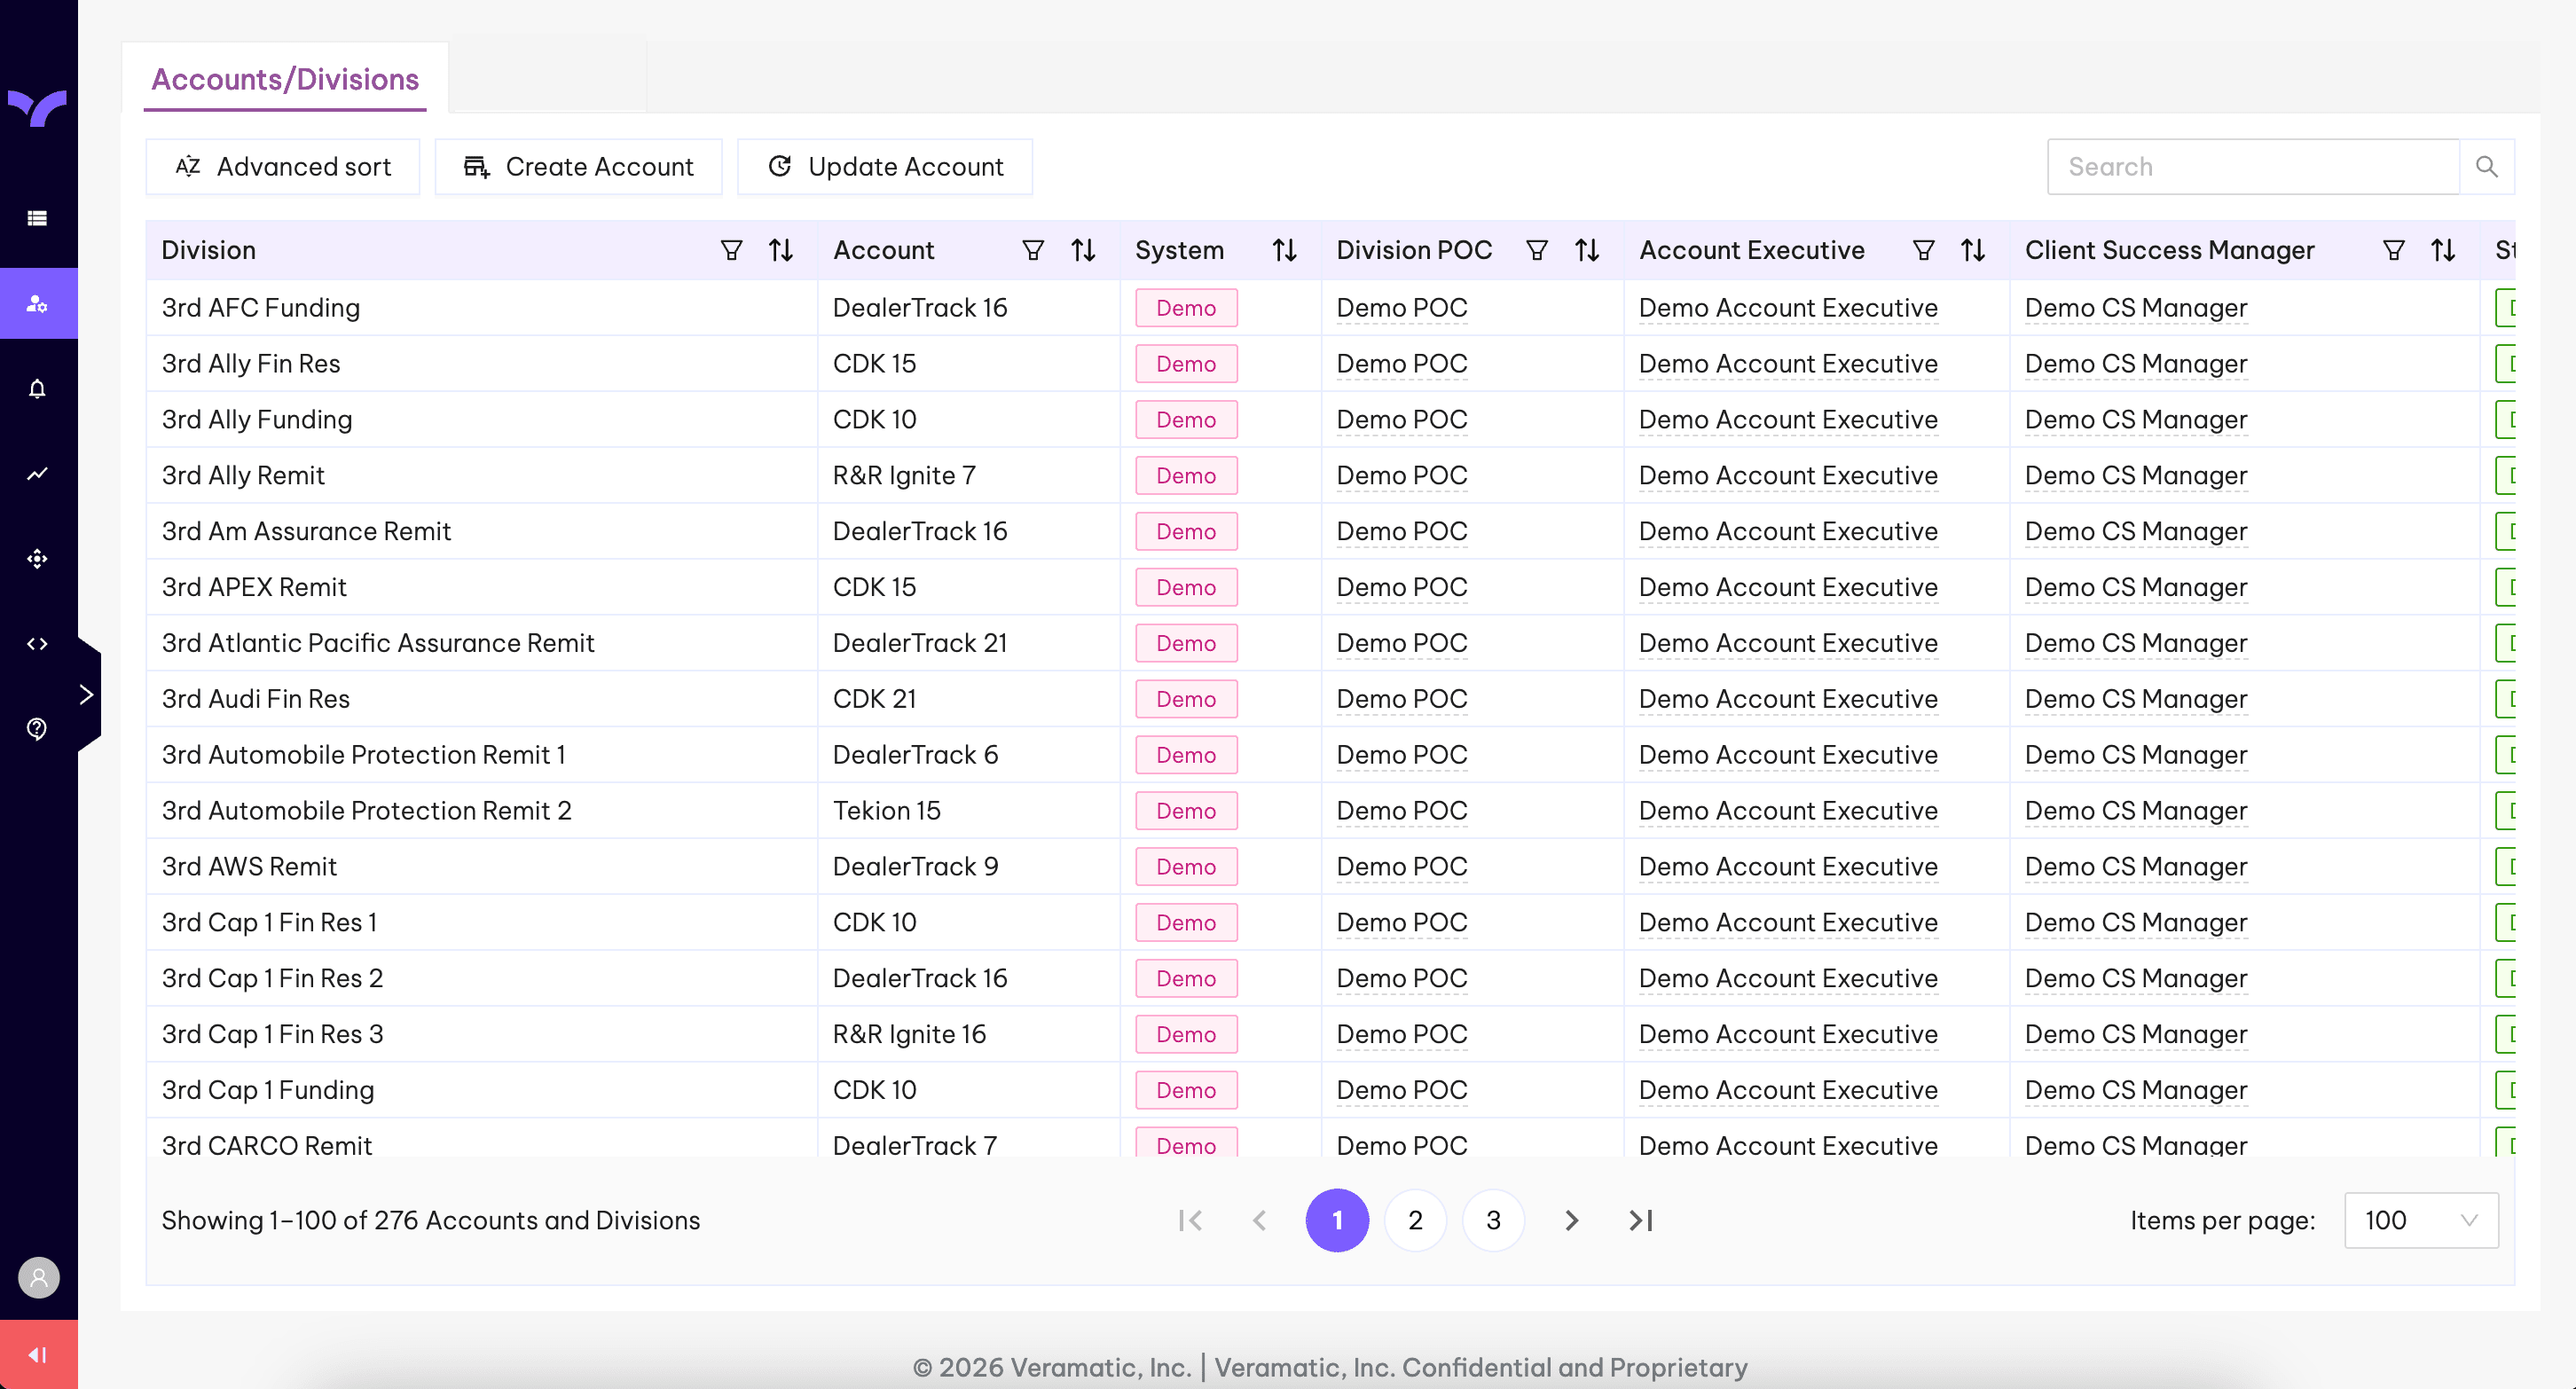
Accounts & Divisions, refreshed
Accounts and Divisions still work the same way, but they’re now presented in a clean table style — the same look as the Reports and Dictionaries tabs. Hover over a contact name to see their phone number and email without opening the profile.
Why it matters
The same details you had before, in a cleaner layout that matches the new look and feel of Veramatic.
How it works
Hover a contact name to view their phone and email.
Click a division or account name to open the full profile.
See Report Center in action
Get a personalized walkthrough of Report Center and the rest of the Veramatic platform — built for the way your back office actually works.